Following A Dream
Follow us!
  • Home
  • About
  • Amanda's Blog
  • The Garden
  • Seed Swap
  • Amanda's Finds and Things
  • Tony's Projects
  • #2's Blog
  • Rabbits
  • Bunny FAQ
  • Barter
  • Store
  • Contact

Strawberry Bed Planted, Bird Update

6/12/2018

 
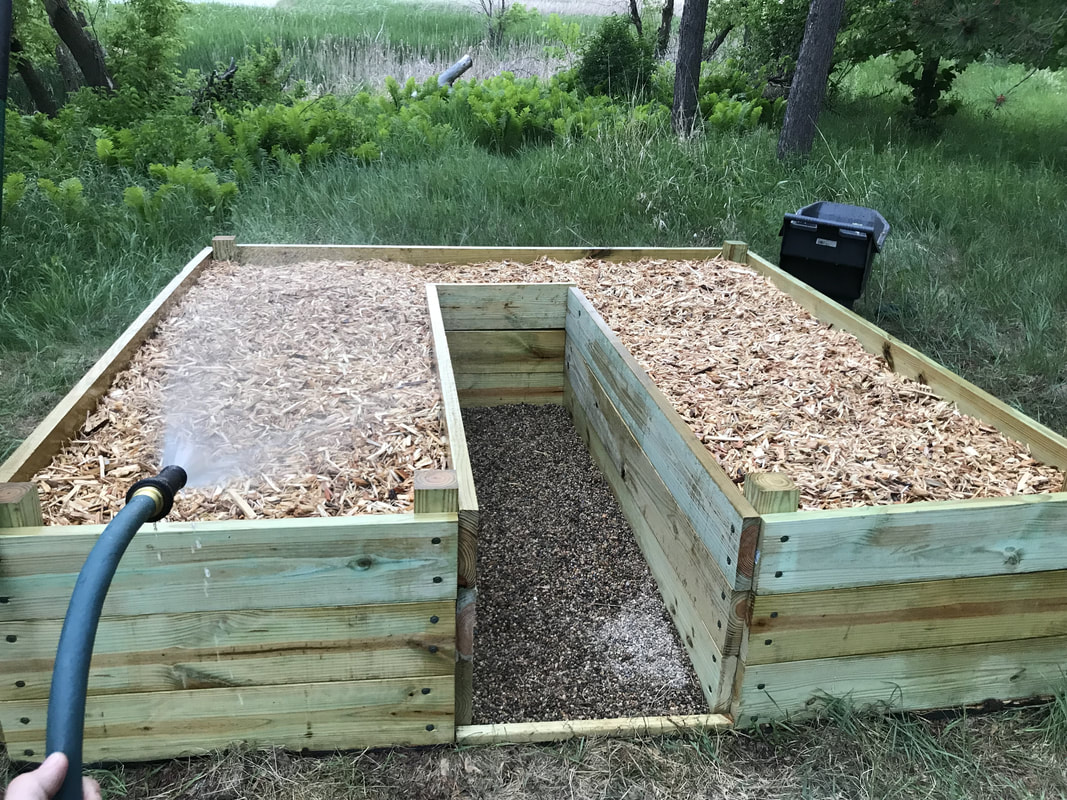
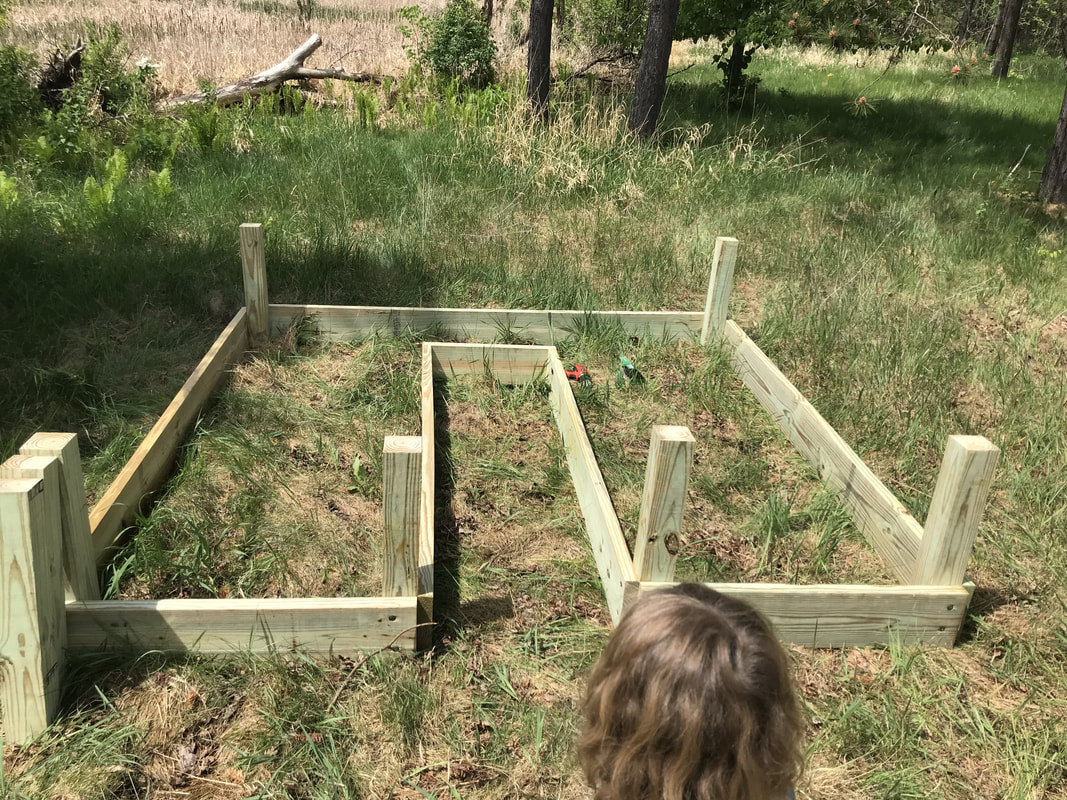
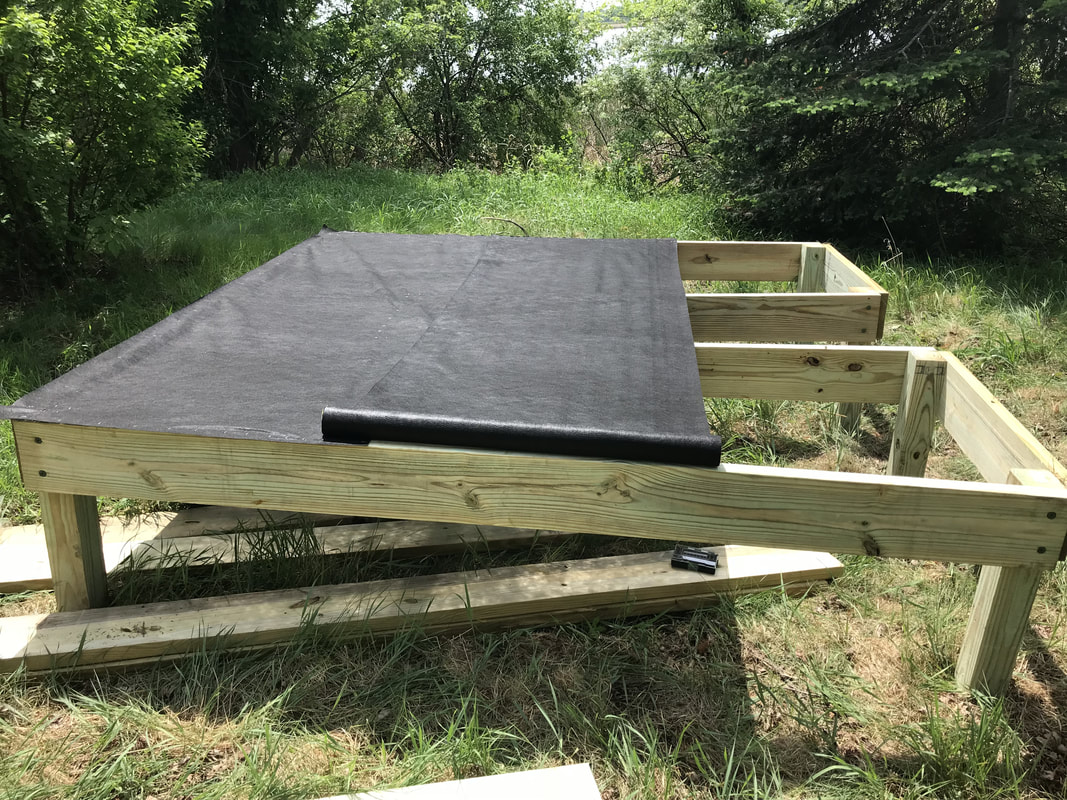
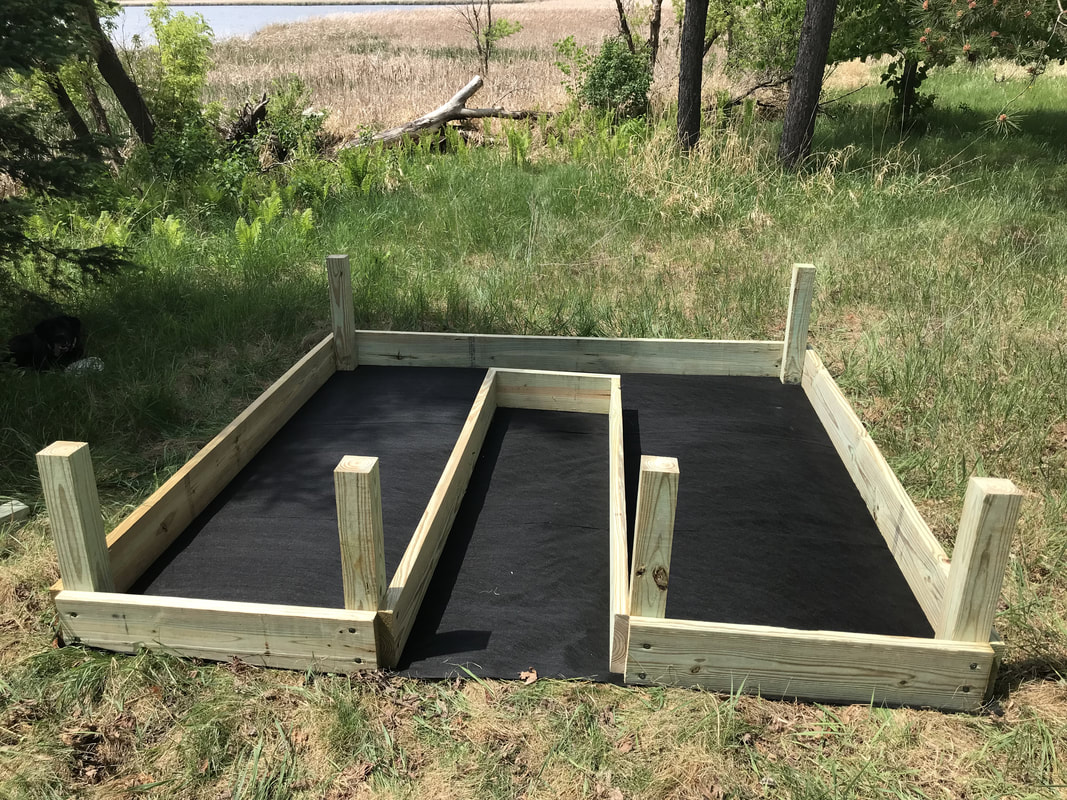
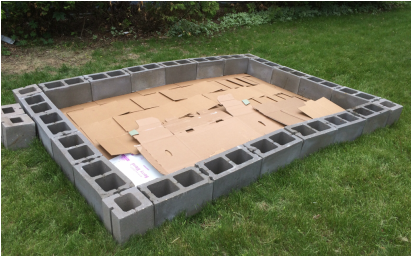
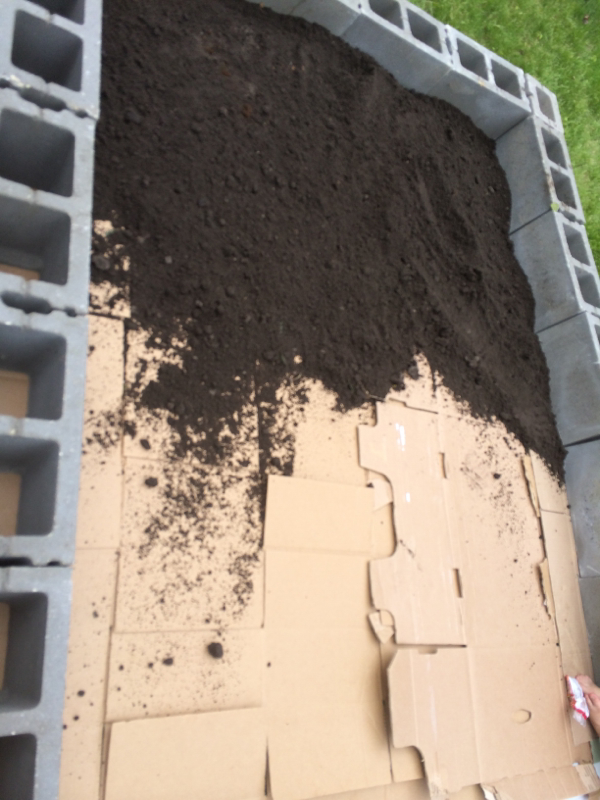
I finally got all of my strawberries planted in the big raised bed today!  There are ten All Star, ten Ozark Beauty, ten unknown ever bearing, fifteen unknown June-bearing, and two from Menards that died and came back again (the tags fell out so I don't know what they are).  This leaves five 1-foot squares left for other things to be planted.  I'm not sure what I'll put in them.  I updated the How To Build A Raised Strawberry Bed page with more photos of the process.
Picture
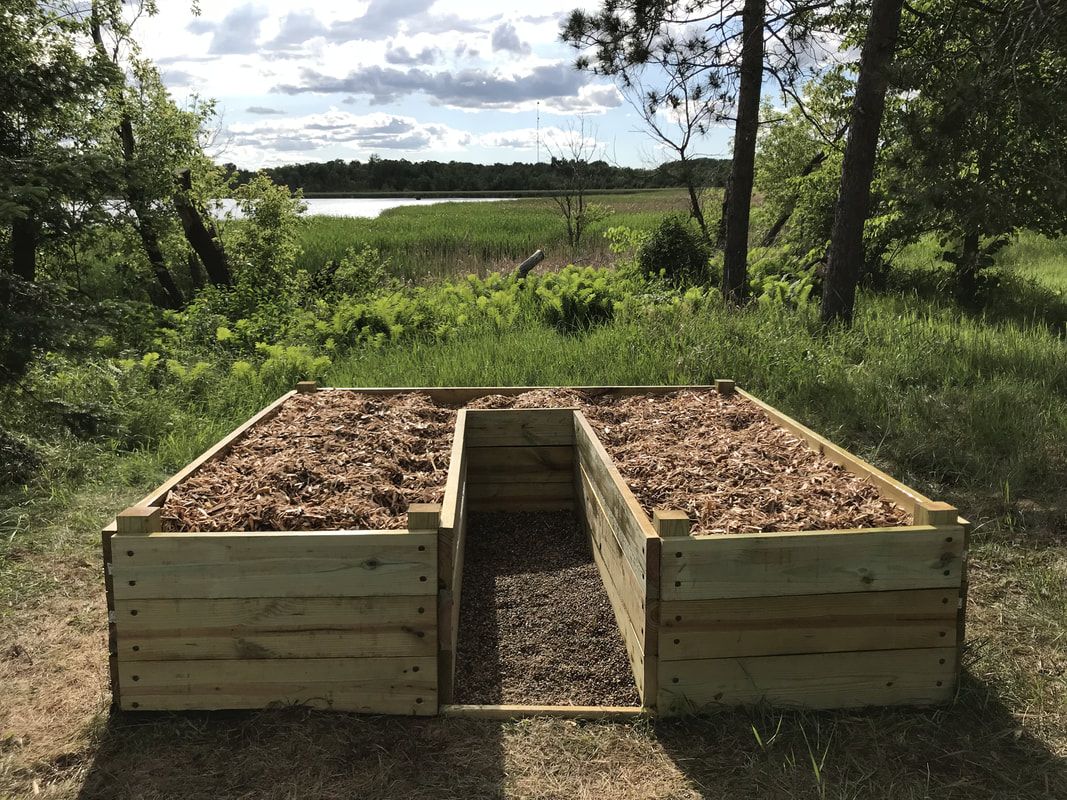
Strawberry bed - planted, watered, and waiting for growth.
I also got the two extra potato towers planted.  I did Pinto Gold in the second tower, and Magic Molly in the third.  I still have a bag of Pinto Gold (six seed potatoes) and two 5-pound bags of Superior and something else.  I have to wait for Tony to assemble some more potato towers before I can get them planted.
Picture
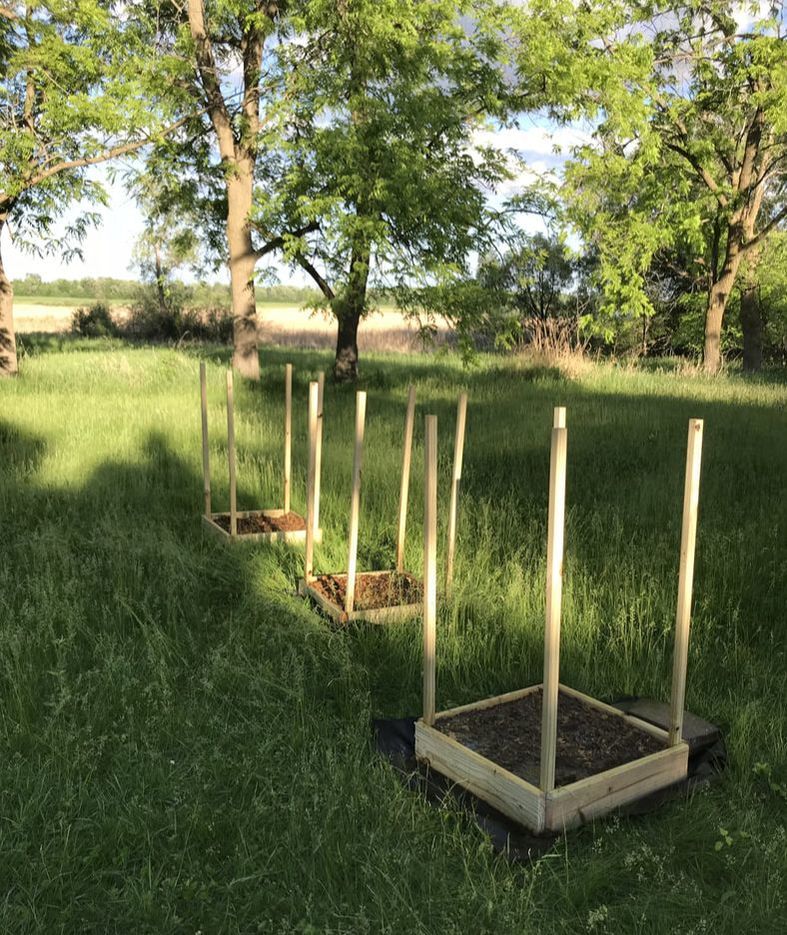
Three potato towers up and planted... And yes, I need to mow!
We lost one of the little ducklings today.  It hadn't been doing well.  Over the last several days the kids and I had noticed it laying in the food dish.  We'd move him over to the water dish and dip his beak.  He'd drink for a minute and then just lay there looking dazed.  The next time we went to check, he'd be laying in the food dish with the same dazed look.  Poor guy.  I have no idea what was wrong with him, but clearly there was something not quite right.

Tonight I decided to swap some of the ducklings around.  I kept the three smallest ducklings with the three smallest chicks in the plastic bin.  All the other ducklings were released into the brooder with the slightly older ducklings.  Everything looks alright.  We watched for a long time to see there wasn't any aggression, so I'm hoping all will be well tomorrow when we check in again.

Peg-leg Sue is doing well.  She's somewhat mobile.  She can move around the brooder anyway.  She still falls over sometimes, but she's getting better.  I did find her a few times today hiding behind the plastic container (that has the smaller ducks and chicks in it), away from the other ducks her size.  On the flip side, I also saw her run over one of the smaller ducks when we let them loose in the brooder.  I'm really hoping someone will adopt her.
Picture
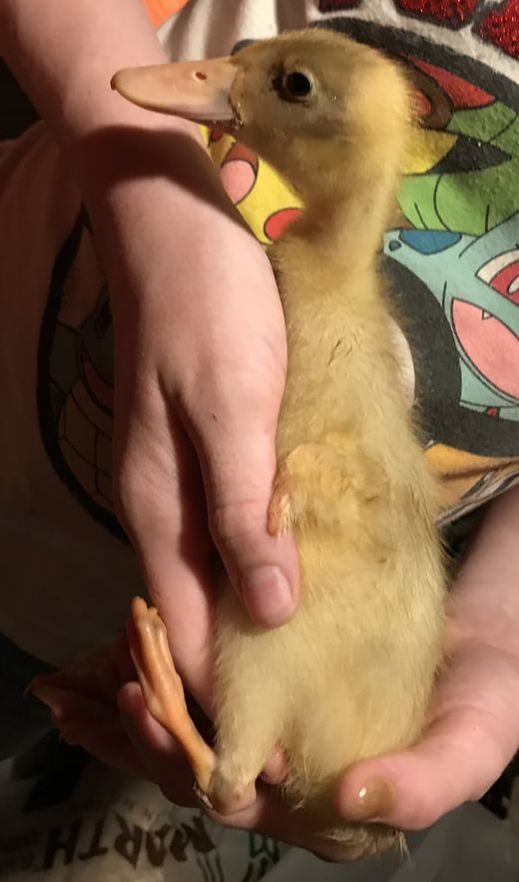
Peg-leg Sue - now 3 weeks old
The bigger chicks in the brooder, from the eggs we hatched from #1's friend, are turning out quite interesting!  Most have a top-knot.  Not like a Polish fluff, but more like the little mohawk on the Spitzhauben chicks we got from the hatchery.  This one in particular has a weird comb.  At first I thought maybe Sicilian Buttercup might be in the genetics, but looking closer, I think maybe it's just a weird defect.  It looks neat though.
Picture
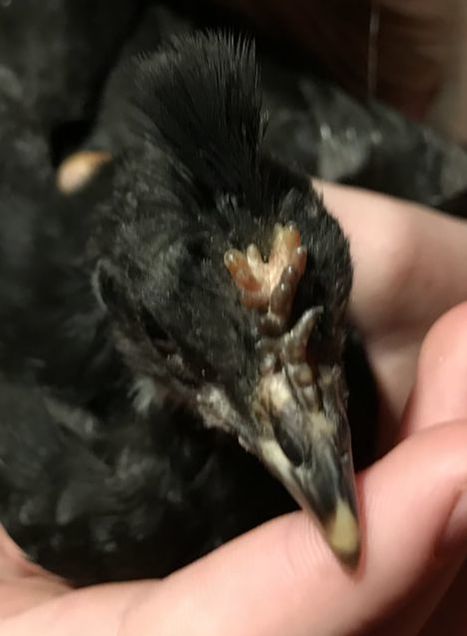
There are two especially pretty birds in the brooder right now.  Looks like they might be hens, and if so, they'll both be staying.  Oddly enough, both are smooth topped (no crests).
Picture
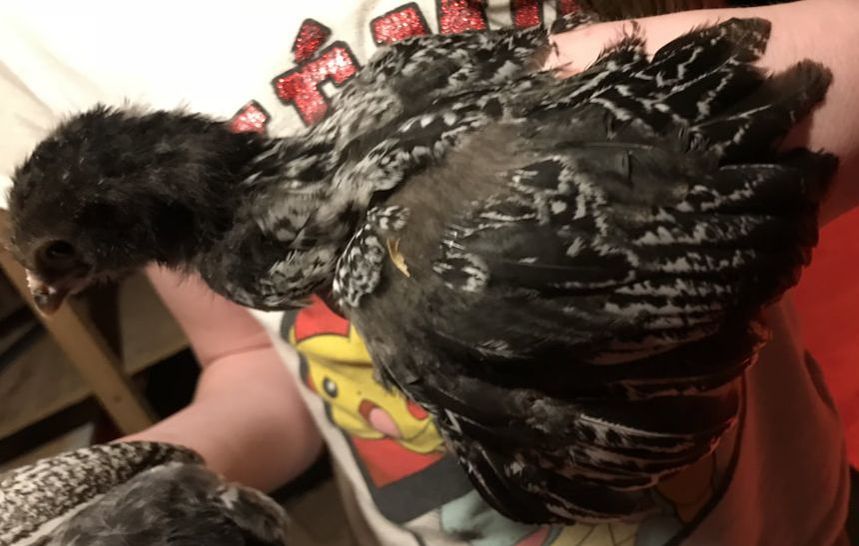
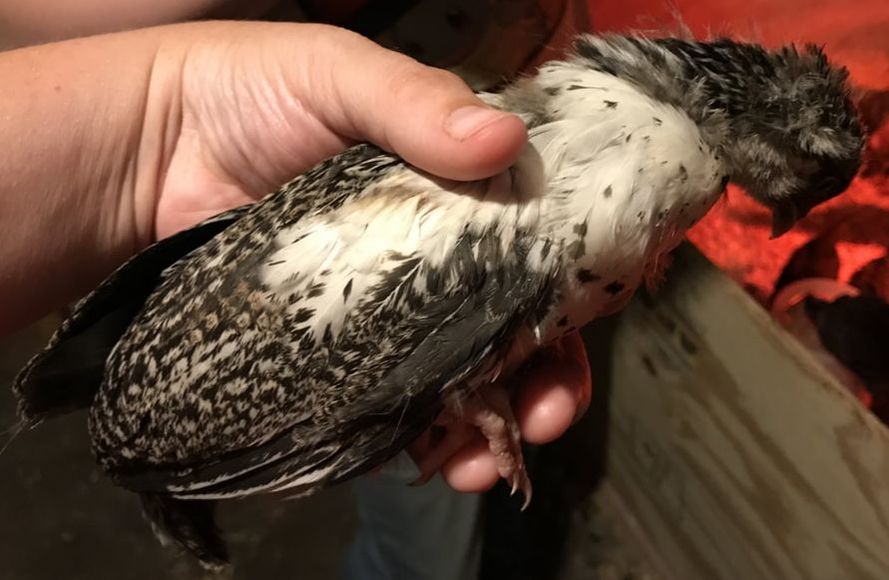
The chick above is dark colored but the feathers are speckled with grey.  The chick below was the cool speckled one I liked initially, and now it's getting white feathers across the breast and tops of the wings, and speckled brown wing feathers.
Picture
It's going to be interesting to see them get bigger.  Such pretty color variations!  Of course we also have some Black Sex Link from Henrietta as well.  They're pretty easy to tell apart given their color and lack of head fluff.

Speaking of, Henrietta has been on egg laying strike for a month now.  I hope she starts laying again.  She's stopped, Quiche hasn't laid an egg since she went broody, and now Matt and Dashi are sharing a nest and hissing and snapping at any chick who wanders too close.  No fresh eggs for now.  But maybe some more ducklings when Dashi and Matt start hatching their eggs out.

Raised Strawberry Bed Complete

6/10/2018

 
Today has been productive to say the least.  I slept in and woke up thinking I'd wasted all morning.  Mad at myself, I rushed through breakfast and got the boys out the door to help.

Tony cut the last pieces needed to complete the strawberry bed, and we started to screw boards onto the frame work.  About two boards in, the battery for the drill died, so he had to get the back up and put the main one on to charge.  Literally three screws in to the second battery, it died too.  Well, so much for that project.

To kill time while we waited for batteries to charge, Tony cut all the wood to make all six of the potato towers.  By then the second battery indicated it was charged (weird, but ok).

We got the last boards onto the strawberry bed, and realized we needed some more supplies.  We needed more river rock for the bottom level, and the end of the walkway was uneven, so we needed to buy some braces.  Off to Menards we went.
Picture
Mazikeen "helping" with the strawberry bed.
Before we left, Tony managed to bang out one of the potato towers.  We opted to add the landscape fabric underneath this time.  Last time we were working in an area that was already tilled up and weed free.  This time the towers will be placed in a grassy area, so it will be easier this way to keep it weed free.

I threw some compost and manure in the new potato tower, and planted the two pounds of Purple Viking potatoes I had ordered online a while back.  There was a grand total of eight little spuds in there, each starting to grow.  I planted them whole.  The idea being that you should hold back your biggest and best for seed, and with potatoes, the plant grows from the nutrients in the seed potato.  If you cut it into smaller pieces, you'll have more plants, but they'll have to work harder to produce.  You should get bigger, stronger plants, which in turn should produce bigger potatoes.  Right?
Picture
Potato Tower with Purple Viking potatoes (2-pounds = 8 potatoes)
We picked up five bags of river rock, thirty more bags of mulch, four corner braces, and a new drill with a better battery.

Upon arriving home, we added the river rock to the bottom of the strawberry bed, then added a layer of mulch over the rocks.  We paused long enough for Tony to put the corner braces on the outer edges of the end of the walkway (inside the planter), before starting to add loads and loads of manure and compost over the mulch.  Then we added another layer of mulch, and another layer of compost and manure, before adding a thick layer of mulch over the top.

The last layer of manure was a struggle.  Our trusty wheelbarrow that we've had for three years finally broke.  One of the wheels snapped and came right off.  I had to haul manure and compost by the bucket back and forth.  Eventually I gave up.  I had wanted a lot more in that level, but my back and shoulders were killing me and I was so tired of walking back and forth.

​When it was all finished, I soaked the entire thing down for several minutes to make absolutely sure that all levels are wet and would be prepared for planting.
Picture
Wetting down the finished strawberry bed - broken wheelbarrow in the background.
Today we also managed to get the fruit trees all watered, I refilled the bird pool three times, and I negotiated a second sleep over for the girls to stay at Grandma's house one more night.  I cut up some of the crab apple branches I sawed off a while ago, and soaked them in a bucket.  Tony is out grilling with them right now (insanely late dinner).  He says it just smells like smoke, so maybe crab apple wood doesn't work the same as apple wood.  I wonder if I could chip it up more and try it in the smoker some time.  I'd hate to waste it if I can find a use for it.  But if all else fails, I'm sure we could always have a little campfire and roast marshmallows or something over crab apple wood too.

It's supposed to rain tomorrow.  Yes, I knew that when I soaked the strawberry garden.  I wanted to make sure it actually got thoroughly soaked down.  That means tomorrow I can catch up on indoor chores, and Tuesday I can make it my goal to get all of my strawberry roots planted.  Maybe Thursday we can add some chicken wire to the upper portion to keep pests out, but if not, I'm alright with how it is for now.  It looks awesome.  I am working on putting together a page on How To Build A Raised Strawberry Bed with photos in case anyone wants to make one like ours.  Please, feel free to take my plans, modify them however you see fit, and make one yourself!  If you blog about it, all I ask is for you to link back to the plans page to give me some credit.

Oh, and my beloved sumatra chicken died overnight.  I have no idea why.  She was the sweetest bird, so tame, the kids loved her.  Tony said if we order guinea chicks from the hatchery next month, we can add a Sumatra chicken on to the order.

Raised Strawberry Bed - Part 1

5/27/2018

 
I woke up early again this morning.  It was 5:30, no alarms, just awake suddenly.  The sky was overcast, and I thought - maybe I'm just not used to being up this early.  It's not supposed to rain today.  But then I was incredibly tired and decided to go back to sleep.  I always get uncontrollably sleepy when rain is coming.  I don't know why that is.  I woke up again a few hours later, groggy and still sleepy, to my husband telling me it was starting to rain, so we would have to put off our morning plans for a while.  Finally, about 10:30 the rain started to let up a bit, and I decided to go ahead and work outside, even if I got wet.  By the time I finished a muffin and a cup of coffee, the rain had stopped.

The project this morning?  The raised strawberry bed.  I figured we wouldn't get through it today, but I wanted to at least get the frame and bottom half done, and the landscape fabric stapled on.
Picture
Basic frame / bottom boards (the back of #5's head as he checks on our progress)
We started with the basic shape.  Three sides are 8-foot long 2x8's, the front is two 3-foot long 2x8's, the walk way is two 6-foot long 2x8's and a 2' 2x8 at the end.  We used 24" lengths of 4x4's to brace all of the corners except the far end of the walkway.  We did have to add a temporary chunk of 4x4 to the middle of that 2-foot piece for the next step.

We carefully tipped the whole frame toward the open side, and then completely over (upside down).
Picture
Adding the landscape fabric to the bottom (frame is upside down)
We used 3-foot wide landscaping fabric and stapled it along the boards.  It took three overlapping lengths to finish covering the entire bottom (flipped upside down as the top in these photos).  Make sure you overlap the fabric at least an inch or two to prevent weeds and grass from coming up between the pieces.  We also overlapped the edges just a little too to try to prevent any from sneaking in the sides.
Picture
Landscape fabric done, ready to flip the frame back over
Once the landscape fabric was completed, we carefully tipped it back over again to be the right side up.

We did not pull grass or even the ground.  As you can see below it is uneven, but once we add in soil and stuff it should be fine.

We will add two more sets of 2x8's all the way around to make the entire bed 24" high.  The walkway will have pea gravel to prevent weeds in the future, long after the landscape fabric has disintegrated with time.  The garden space will have something in the bottom to take up space (probably mulch), then lots of compost, a layer of good soil and then mulch on top to keep the strawberries as weed free as possible.

Then it's just a matter of marking off the measurements for a square foot garden and planting all the bare root plants we have waiting to see soil.
Picture
Bottom framework complete! Ready for the second and third levels!
Once we completed the strawberry bed framework it was off to pick up Tony's Father's Day gift... Yeah, those of you who follow the blog know, we decided to get a puppy.  Now, before you jump up and start hollering... I do not condone giving animals as pets.  This was a family decision, he was given ultimate decision on if he wanted a puppy or not.  He's wanted a Saint Bernard for many years, but we've lived in town and never had space.  We have a small house, but we have a huge yard now.  I happened upon an ad for Saint Bernard puppies a while ago and showed him the photos, told him the price, and asked if he'd be interested in getting one as his Father's Day gift this year.  He thought about it for a couple of days and decided he did want a puppy (his first dog - I've had several, but he's never had one that was his).  Unfortunately the pup we picked out initially died when it was smothered in a puppy pile on a cold day.  Our hearts broke, but the breeder was very nice about it, even sent the pup off for medical testing to make sure it wasn't any kind of genetic issue or something that could be a problem for the other pups... Then he offered us the last female in the litter, who's family had backed out and no longer wanted her.

Today, this little girl came home with us.  She doesn't have a name yet, but the kids are excited.  Moose could care less, but he has growled when she gets too close to his toys (so I have been putting his toys away every time he does this until he'll have nothing else to fuss about).  Her only down side so far?  She likes the chickens a little too much.  Several times I had to chase after her hollering to get her to stop chasing them.  She seems to understand "no" when she starts mouthing something she shouldn't (like my flowers, or the laundry basket), but that becomes meaningless when she's got a chicken in her sights.  She's going to have to learn pretty quick that I'm not about to tolerate that behavior!
Picture
#5 held her the whole drive home.
Picture
She's pretty mellow for now.
In other news, the kids found Iris today.  We suspect she'd been on a nest the last several days, and with this extreme heat she came back to drink, and either drank too much or waited too long to get a drink.  She was dead in the barn this afternoon.  She wasn't there the day before yesterday, and I didn't see her when I closed up the barn last night.  Given the smell, she couldn't have been dead for very long.  Yesterday was 95-degrees, so if she'd have been sitting out in that heat she'd have stunk the whole barn up.  She had to have come back either yesterday evening, or this morning right after the barn was opened up.  The kids tried today to find her nest to try to save her eggs, but couldn't find it.  At least now we know.  I've already talked to Tony and we may order some guinea babies from the hatchery later this summer, when it's warm enough for them to go straight out to a brooder in the barn and bypass being in the house.

Today, Josh finally took the ducks down one of the paths to the lake.  We're currently surrounded by bog, but there's tons of duckweed growing just off the shore.  He walked down the path enough for three of the four ducks following him to realize the delicious bounty and swim space... He walked back up to the yard with just one duck.  He wandered across the yard toward the barn before realizing some of his ducks were missing.  He spent the next half an hour screaming and searching for his ducks - who were happily playing in the reeds just off the edge of the yard, out of sight.  They did eventually reunite, but later those same three ducks wandered back without him to the lake, and he again screamed and wandered the yard until they came back.  Where is the fifth duck in Josh's flock you ask?  Quiche has decided to be unlike other Indian Runner ducks, and went broody.  She only leaves her nest in the morning to run out and get a drink and then goes right back to her nest.  Last I checked she was sitting on three eggs.

Tonight, as I closed up the birds in the barn, rechecked waters, and made sure everyone was settled in for the night, I shoveled up a wheelbarrow full of compost and manure from under cages (and some of the bedding from having just cleaned out the barn brooder today).  This will serve as the compost and manure for the holes for the orchard.  I'm hoping to get as many planted as I can tomorrow, because it's supposed to rain Tuesday and Wednesday - this way I won't have to haul as much water out.  Let Mother Nature do the work for you, right?  I'll still have to water the compost and again once the trees are planted before the mulch goes down, but hopefully the rain can soak the mulch and keep it all moist for a while.

Pickling Rabbit Hides - Day 1

11/24/2017

 
It's Black Friday, and while most Americans are our shopping for the best deals, I am finally getting around to processing rabbit hides for the first time.  I've amassed a collection of rolled up rabbit hides in the freezer in two plastic shopping bags.  The culmination of various culls during the illness outbreak, a couple of meat rabbit pelts, and one that was culled due to temperament issues.  It's about time I got my freezer space back, and since I have all of the ingredients on hand, there's no reason to keep putting it off.  Here goes!
Picture
Alum Sulfate
You will need one cup of Alum Sulfate, and one cup of non-iodized salt.  I bought the salt at Menards, and the Alum from Amazon.  If you can't find these locally, you can buy them both on Amazon.
Medley Hills Farm Alum Granulated Powder (Food Grade) 1 lb
Mrs. Wages Pickling Salt, 48-Ounce
Picture
Non-iodized salt
In a clean five gallon bucket, add three gallons of warm water and mix your one cup of alum sulfate and one cup of non-iodized salt until all ingredients are dissolved.
Picture
Dissolved mixture
Add your hides.  Mine were frozen so it took a while for them to thaw out, but once they did, I unrolled each one, held it under the water and gave it a gentle squeeze (never wring hides) to get the air bubbles out.
Picture
Hides are thawing in the pickle mixture
Once all of the hides were wet enough to sink, I stirred them around a bit more just for good measure.  When no more air bubbles were coming up, I put a plate on top of them to make sure they remained submerged.  You don't want any part of the hides or fur to be sticking up out of the water!

Now it will sit in this mixture for one week.  Be sure to stir it around every day to make sure the pickle solution can reach all parts of each of the hides.  You want a nice thorough pickling.  Don't miss any parts!


After one week in this solution, the hides will be removed from the bucket.  Be sure to gently squeeze the liquid back into the bucket - it will be used for the second part of the process.  Again, remember - never wring or twist hides!

Each hide will be removed and any remaining flesh will be hand peeled from the hides.  I'm told this is a tedious process, and where many people struggle or give up.  I refuse to waste the pelts.  It seems that would be dishonoring the animals that died.  Because today is Friday, these pelts will be ready to de-flesh next Friday and over the weekend, which means I can have kids help too.

Once the hides have been fleshed, you'll add one more cup of Alum Sulfate, and one more cup of non-iodized salt to the bucket and mix again until completely dissolved (essentially doubling your pickle solution - but don't add any more water).  Add the hides, stir well, and again anchor with a plate to assure all hides are under water.  They will stay in this mix for another two weeks (14 days), and you should continue to stir the mix every day to make sure there are no bubbles or places that aren't getting access to the solution.

At the end of the second soak, it's time to start the last part of the process - cleaning and drying!  If you have had your hides in tube form, now is the time to cut then open down the belly.  If your hides were flat then obviously you can skip that step.  Rinse your hides a couple of times in your bathtub to get as much of the alum/salt solution out as you can.  There will be a lot of loose hair, so use one of those screen plugs for your drain to prevent hair clogs.

At this point, some people will wash the hides with soap or shampoo.  This isn't required, but if you want them to smell nice, you can use a scented body wash.  Rinse well.

​Squeeze out as much water as you can (remember, never twist or wring), and hang them up somewhere out of the way to start to dry.  As they are drying, stretch them a couple times per day.  Don't let them dry without stretching or they'll turn into rawhide.  Breaking the leather will turn it white and it will be soft and supple.  Work around the edges first and then work toward the inside.  Be careful around the edges and thinner spots.  You can also use the back of a chair to help you break the leather (leather side down).

Once your hides are dry and stretched, brush out the fur.  You can add mink oil to the leather side if you desire.  I'm not sure if I will do that or not.  I have not looked in to the price of mink oil yet.

One video I watched said it's easier to start fleshing from the back to the front.  One video suggested doing 3 cups alum and 3 cups salt in three gallons of water and then only soaking for 7-14 days before cleaning and drying.  Some people say to cut the pelts flat before tanning, some say to go ahead and tan them still in tube-form.

Another note about the alum/salt pickling.  It's not technically an actual tan.  It's a pickle.  So if your hide gets wet again, you have to start all over with breaking the leather again.  This is not a method you should use if you want to use the furs for clothing or something that will potentially get wet or require being washed in the future.

So what do you do with a hide once it's been pickled?  I have a few potential ideas.  I could sell them.  Processed hides usually go for about $3-$5 each on eBay (from my recent search for sold items anyway).  There isn't much market here locally as we live in a small farming community and many people also have rabbits.  Most commercial fur places have strict requirements for the fur they will buy - how it has to be treated, the age or breed of the rabbit used, and the color of the coat.  Since we don't have mass quantities of furs, and most of ours are mixed breeds of random colors, selling commercially isn't really an option for us.  Another option I've considered is making a big blanket from the furs.  I know there are special ways to sew leather, and that the blanket would not be washable.  I'm allergic to rabbit fur, and I'm not sure if the pickle and the processing will make a difference, so I don't know if I'll be able to snuggle up with the finished pelts yet.  That and five kids plus pets means pretty much everything in the house has to be washable.  We can always give pelts as gifts or trade for things we want or need.  Another alternative would be to take some of the furs (particularly ones that are damaged during the breaking process), and cut them into strips to incorporate them into cat toys.  Cat toys can be given to our cats, given as gifts to our cat-loving friends, donated to area animal shelters, or sold to make some extra money.  There's always a market for humanely raised small-farm supported craft supplies too.  We could sell a kit with scraps of old fabric, a couple feathers from our birds, and a few strips of rabbit fur as a "make your own cat toy" kit.  I'm sure there are lots of other ideas out there if I scoured Pinterest or asked on some of the rabbit forums.  Really, let your imagination lead you.  But remember, that by using the whole rabbit, you are honoring their sacrifice.  No need to waste what could be used.

Patriotic Bandanna Wreath

6/3/2016

 
I completed my bandanna wreath project today.  It's not exactly as I saw it on a Facebook post scrolling through my newsfeed, but I like it anyway.

​To start out, the original post I found called for six red, six white, and six blue bandannas.  You can find them at most dollar stores, or at Walmart.  If you buy them from the craft section at Walmart they are 97-cents, but if you buy them from the accessories isle (purses, scarves, handbags, etc) at Walmart, they're $1 each.  In this project I only used 3 blue, 3 white, and 4 red (with half left over.  You will also need one wreath ring.  I've seen people use metal wreath rings with three bars, and I've seen people suggest the floral foam rings.  I guess you could use something store bought, but I happened to have this metal ring that once held a pine bough wreath, so that's what I used.
Picture
You will need to cut your bandannas in half.  Most designs have a pretty clear line, and if yours doesn't, just cut along the center fold line.  My advice is not to cut all of them at once.  Cut them as you'll be using them so you don't ruin/waste them if you don't need as many.
Picture
Take one half of a red and fold it in half lengthwise, and then again (now folded into quarters so it's long and thin).  Now fold it in half the other way.  Place it under the wreath wire with the folded end pointed out.  Pull the ends over the wire, through the folded end, and pull tight.  You may need to wiggle it and mess with it to get it on as tight at you can.
Picture
Mine weren't tight against the wire, but it wasn't loose either.  It looked rather relaxed, but tight enough that it wasn't going to slip or fall off.  Some of the knots remind me of the top of a tie.
Picture
Once you have your first red piece tied on, add a white one to the right of it.
Picture
Continue this red/white pattern.  The original project I saw continued it to 2/3 of the wreath wire.  I noticed however,, that the US flag has seven red and six white stripes with both the top and bottom stripe being red.  It also just happened to work perfectly to 2/3 of the wreath to keep this pattern.  This means I did end up with one half of a red bandanna left over.
Picture
Repeat the process with your blue bandanna pieces for the remaining 1/3 of the wreath wire.  Add a wire to the top (between the last blue and the first red piece) for hanging.  Lastly, take all of the bandanna pieces and unfold (fluff out) the ends.  Each knot will have two strips sticking out.  This will give a fuller look and prevent the knots from coming undone as easily.

​Most guides I found suggested adding stars to the blue area, but the bandana design I used (darker edges around lighter middle) seems to make this wreath look complete without any additional stars.
Picture
My wonderful little #5 managed to spill his cup on the blue bandannas before I even started this project.  I had to throw the blue ones through the washer and dryer.  I'm not sure if it's the washing/drying or the fact that the blue bandannas came from the accessory isle while the red and white bandanas came from the craft isle, but the blue ones are much floppier than the red and white ones.  I'm not sure how it's going to stand up to hanging up for any length of time.  It looks great on the table though.  You never know, maybe it would make an awesome table centerpiece with a dish in the middle or something.

​Total expenses for this project:  $9.79 plus tax ($10.57).  Retail value estimated at $20-$30.  This project took under an hour, but the most time consuming part (aside from washing and drying the blue ones) was pulling the staples out of the bandanas from the packaging.

Lemon Garlic Rosemary Chicken

11/24/2015

 
Let me start by saying that I found a recipe online and had every intention of making it per the recipe.  However, stranded at home I realized I was missing an ingredient (oregano) so I substituted Rosemary instead and then tweaked the recipe a bit here and there.  It turned out wonderfully, so here is my version of the recipe.

3 pounds of skinless chicken breasts (I used certified humanely farmed, 3-pounds was 9 breasts)
2-3 teaspoons rosemary
1 teaspoon salt (I used Himalayan salt)
1/2 teaspoon ground black pepper
6 tablespoons butter
1/2 cup water
6 tablespoons fresh lemon juice
4 cloves garlic, minced
2 teaspoons chicken bouillon granules
2 teaspoons chopped fresh parsley
  • Mix Rosemary, Salt and Pepper in a bowl.  Rub it into the chicken.
  • Melt the butter in a skillet on medium heat.  Brown chicken in the melted butter for 3-5 minutes.  (I used 2 tablespoons at a time and cooked three breasts at a time for 5 minutes each side as they were pretty thick)
  • Put browned chicken into crock pot
  • In the same skillet, add the Water, Lemon Juice, Garlic, and Bouillon.  Bring to a boil, then pour it over the chicken in the crock pot.
  • Cover and cook on High for 3 hours or on Low for 6 hours (we did Low).
  • Add the Parsley 15-20 minutes before the end of the cooking time.
This was enough for our entire family of seven for dinner, plus two breasts for the home-schooled kids to have for lunch the next day.  The recipe said it could be served with rice or pasta.  The only complaint on this meal was how bland the pasta was.  I wish there had been more "sauce" with the chicken.  It was delicious and moist.  We will definitely be making this recipe again!
Picture
Lemon garlic rosemary chicken

Homemade Laundry Detergent?

11/12/2015

 
I couldn't sleep the other night so I stayed up looking up information on homesteading.  While we are just beginning to dip our toes in, it seems there's all kinds of people along the way doing homesteading in various ways and to various degrees.  I don't think we'll be setting off to live as hermits on the side of a mountain completely "off the grid," but I do aim to be a little more self-sufficient.  I'd like to know where my food comes from, know that it's not GMO, no pesticides, no herbicides, no added chemicals - completely organic, and in the case of meat, raised and dispatched humanely.  And the pride that comes with growing your own food, having experienced it this year - is fantastic.

In looking up homesteading, I came across a simple recipe to make laundry detergent (check out the original recipe here).  It just so happens that I'm on the last few drops of our regular liquid detergent and won't be able to buy it any more.  It's from one of those club things and we're discontinuing our membership.  Anyway, it sounded pretty simple, so today I went ahead and bought the supplies.
Picture
Arm & Hammer Super Washing Soda (not baking soda) - 55 oz - $3.84
First you measure out one cup of Arm and Hammer Super Washing Soda.  Make sure it's not baking soda.  Add in one cup of 20 Mule Team Borax.  Mix together.
Picture
20 Mule Team Borax - 65oz box - $3.96
Then comes the fun part.  You'll need to use a cheese grater to grate one full bar of Ivory soap.  The original recipe called for Fels-Naptha soap, but someone mentioned that it was full of bad chemicals, and sure enough at the store there's actually a warning right on it that you shouldn't have it touch your skin.  Not something I want to be washing #5's diapers in!  The recipe said that Ivory soap could be substituted as it's easier to find.  I had no problem finding all of the ingredients (including the Fels-Naptha) at our local Menards.
Picture
Ivory Soap (with aloe) 10-pack - $3.97
I did end up buying a cheese grater too, which cost me $4.97.  So far the total investment is $16.74, including a tool I can use indefinitely, and enough bars of soap to make ten batches (I will need to buy more Borax and Washing Soda to use up all the Ivory soap).
Picture
Grated Ivory soap with the new cheese (soap) grater.
The last step is to mix all of the ingredients together and make sure they're equally distributed.  So you've now got

1 cup Borax
1 cup Washing Soda
1 (grated) bar of Ivory soap

Supposedly just two tablespoons per load will wash your clothes and leave them smelling fresh.  There are 16 tablespoons in a cup, so each "batch" will do roughly 32 loads of laundry.  To start I made up an entire plastic bin of this mix - 4 batches.  That should equal 128 loads of laundry, and I still have 6 bars of soap, half a container of Borax and about 1/3 box of the washing soda!  If it works like they suggest, this could save us a lot of money.  We do so much laundry that it adds up fast.  Once we use it a few times, I will write up a post about how well it works (or doesn't work).  Of course the best part perhaps is that when we finished, the grater needed only to be rinsed in hot water and it was clean and ready for next time!  No scrubbing or soaking required.
Picture
Four "batches" of our new dry laundry soap

Dirt Has Arrived, First Raised Bed Is Set Up!

6/2/2015

 
The Hengel truck came by right at 9am and delivered our precious garden soil (happy dance).  Tony was out chaperoning a field trip with the four oldest kids, so I had to wait for them to come home before digging in (little #5 and the new puppy take up all of my attention).
Picture
The dirt has arrived!
Once Tony and the kids got home, we set to work getting the larger of the two planned raised beds set up.  Here's a photo of the lawn before we started to set up.  What a waste of space if you ask me.  Grass that needs to be mowed regularly... not pretty to look at and definitely not productive for a hungry family!
Picture
BEFORE: What our lawn looks like without the raised bed garden.
We started by laying out cardboard, and then putting the blocks along the edge.  the cardboard is a barrier between the good garden soil and the grass and weeds beneath.  It is meant to keep the grass and weeds from just coming up in the raised garden.  Using cardboard also assures that in a year or two it will compost itself, further helping the garden (or at least that's the idea).

This garden is four bricks by six bricks, each being 16-inches long by 8-inches tall by 8-inches wide.  All four corners are 8-inch square blocks.  Total dimensions inside are 64 inches by 96 inches by 8 inches deep.  The holes in the bricks will also be used to plant in, which adds that much more space to the garden.
Picture
Preparation - cardboard laid out to prevent grass and weeds from coming up through the good soil, and bricks laid out for the edge of the garden.
After the first wheelbarrow full of dirt, I realized that it was going to be a lot more work that I anticipated to fill this garden with soil.  The soil was delivered in the back yard, and this garden is in the front.  The shoveling isn't bad, but pushing/pulling that heavy wheelbarrow all the way from behind the garage to the front yard is back breaking.  I have a new-found respect for professional landscapers!
Picture
Starting to fill it with dirt
We didn't quite finish this project today.  It started to sprinkle and we needed to stop to make/eat dinner, but it looks pretty good anyway.  I need to finalize my planting design so we can get stuff in there as soon as possible.  I was considering doing some corn, peas, beans, squash, cucumbers, pumpkins, and melons in this one.  I just need to set up a trellis along that back side.
Picture
About 8 wheelbarrow loads of soil. It still needs more, but we are calling it quits for tonight.

Easter Eggs

4/3/2015


We dyed our Easter eggs today. For most of them we did the standard Paas dye kit that we've done every year. For a select few (18) we tried something new. A rice method!

Get some small containers (we used sour cream and frosting containers), and add just enough dry rice to cover the bottom. Add a few drops of food-safe coloring. Close the containers and shake to spread the dye through the rice. Once it is thoroughly colored, add a hard-boiled egg. Close the container and gently shake.

The eggs turn out brightly colored with interesting designs.

Picture
Eggs dyed using a new rice method!

The kids enjoyed this project, but I did find it a little wasteful of the food coloring. You really need to add more dye for each egg or there isn't enough to color the second one. In the photo above you can see one purple and one orange. After the kids lost interest, I added some red dye to the yellow container (orange) and some blue dye to the red container (purple). Just so we wouldn't waste the rice, I cooked it after our project.

Picture
Dyed rice

Unfortunately, cooking it took out most of the dye. It ended up looking about the same shade as fried rice, which is really deceiving since it still tastes like plain white rice.

Picture
Cooked dyed rice

How to cut a spaghetti squash

3/20/2015

 
A friend of mine recently posted on Facebook asking for tips on how to cut a squash after breaking her knife (having used a hammer to try to slam through the vegetable).   I admit, we're fairly new to the world of squash eating, but we've become big fans of spaghetti and acorn squash.  We don't use a hammer to pound the knife through the squash, so I thought it might be fun to make a "how to" video on how to cut a spaghetti squash.  Here's Tony, cutting a spaghetti squash with a knife without using a hammer.  Please feel free to share this video if it helps you.
And don't mind Mocha in the background.  She made a guest appearance in this video.

    Amanda's Blog

    Amanda's blog about everything, important and trivial.

    Archives

    February 2019
    January 2019
    December 2018
    November 2018
    October 2018
    September 2018
    August 2018
    July 2018
    June 2018
    May 2018
    April 2018
    March 2018
    February 2018
    January 2018
    December 2017
    November 2017
    October 2017
    September 2017
    August 2017
    July 2017
    June 2017
    May 2017
    April 2017
    March 2017
    February 2017
    January 2017
    December 2016
    November 2016
    October 2016
    September 2016
    August 2016
    July 2016
    June 2016
    May 2016
    April 2016
    March 2016
    February 2016
    January 2016
    December 2015
    November 2015
    October 2015
    September 2015
    August 2015
    July 2015
    June 2015
    May 2015
    April 2015
    March 2015
    February 2015
    January 2015
    December 2014
    November 2014
    October 2014
    September 2014
    August 2014
    July 2014
    June 2014
    May 2014
    April 2014
    March 2014
    February 2014

    Categories

    All
    1
    #1
    2
    #2
    3
    #3
    4
    #4
    #5
    Aquaponics
    Arts Crafts
    Aspie
    Bonanza Shop
    Books
    Breast Feeding
    Business
    Cats
    Chickens
    Cloth-diapering
    Ducks
    EBay
    Embden Geese
    Garden
    Guinea Pigs
    Guineas
    Home Schooling
    Homesteading
    How To
    Incubator
    Indian Runner Ducks
    Josh The African Goose
    Kittens
    Mazikeen
    Metal Detector Finds
    Nadia
    Orchard
    Rabbits
    Rabbit Tractor
    Recipes
    RedBubble Shop
    Research
    Roland
    Seed Bank
    Tony
    Turtle
    Vermiculture
    Videos
    Winter Sowing
    Zombie

    RSS Feed

Powered by Create your own unique website with customizable templates.